The Complete Guide to LED Downlight Fitting
Sizes, Prices, and Pro Tips
Lighting shapes how you feel in a room. Choose the wrong fixtures and your kitchen looks flat. Choose wisely and every surface pops. In modern homes and commercial spaces, LED downlight fitting stands out because it delivers sleek style, strong efficiency, and precise control. This guide walks you through planning, sizing, installation tips, safety essentials, cost ranges, and maintenance. You’ll finish with a clear plan for your next lighting upgrade—and you’ll avoidthe mistakes that lead to patchy light or expensive rework.

Why LED Downlight Fitting Leads the Way
Homeowners and designers love downlights for three reasons. First, they hide the hardware and let light take center stage. Second, they trim energy bills while boosting brightness. Third, they adapt to almost any room—from corridors to lounges to showers. Because LEDs run cooler and last longer than old lamps, you reduce maintenance, minimize heat, and improve comfort. Moreover, you gain access to dimming, color temperature adjustments, and smart control without bulky fittings.
Planning Your Layout: Brightness, Beam, and Balance
Good lighting starts on paper. Map your room, mark key zones, and decide where you actually need brightness. Then choose the number and placement of fixtures that deliver even coverage.
-
Target lumens, not just watts. For living rooms, aim for 1,500–3,000 lumens overall, then layer task lighting as needed. Kitchens usually need more, especially over counters.
-
Balance beam angles. Narrow beams (24–36°) punch light onto islands or art; wider beams (60–90°) spread light softly across general areas.
-
Stagger rows. Align fixtures so beams overlap slightly. Consequently, you avoid bright “hot spots” and dark patches.
-
Keep away from walls. As a rule, place the first row about 60–90 cm from walls to reduce harsh scalloping.
Because you plan first, you buy fewer fittings and achieve a better result with less effort.
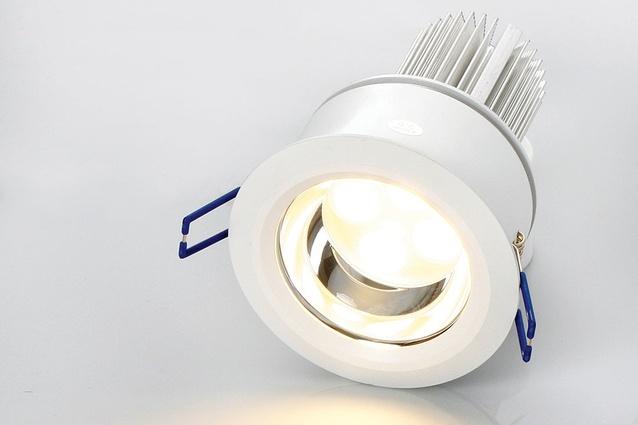
Choosing Ceiling Downlight Fittings: Trim, Tilt, and Task
Ceiling downlight fittings come in fixed, gimbal (tilt), and adjustable multi-angle designs. Choose fixed trims for broad ambient light. Pick gimbal heads to wash artwork, highlight shelves, or punch light onto countertops. For task-heavy areas like study nooks or workbenches, adjustable fittings let you fine-tune angles after installation.
Additionally, trims influence the look and the glare. Recessed baffles reduce glare for cozy rooms. Polished or microprismatic trims sharpen the look for contemporary spaces. Low-glare lenses and deeply recessed light sources dramatically improve visual comfort; therefore, they’re ideal for living rooms and bedrooms.
Understanding Downlight Fittings Sizes
Downlight fittings sizes typically follow the cut-out diameter required in your ceiling. Common residential sizes include 70–75 mm, 90–95 mm, and 110–120 mm. Compact sizes suit corridors and small bathrooms. Medium sizes suit open-plan living and kitchens. Larger apertures push out more light per fitting; however, they need careful spacing to avoid “spotty” ceilings.
Because ceiling thickness varies, always check the maximum and minimum ceiling depth the fitting accepts. Shallow fixtures help in tight cavities, while deep fixtures often deliver superior glare control.
Color Temperature and CRI: Get the Mood Right
Pick color temperature (CCT) to match the mood and purpose:
-
2700–3000K: Warm, relaxing, brilliant for lounges and bedrooms
-
3500–4000K: Neutral and crisp, perfect for kitchens, studies, and bathrooms
-
5000K+: Daylight-like, useful for garages or high-focus task areas
Look for CRI 90+ to render skin tones, food, and textiles naturally. In retail corners or show kitchens, high CRI sells your design because colors read true.
Dimming, Drivers, and Downlight Bulb Fittings
Great light feels controllable. Dimming extends ambience and saves power. Match your dimmer to the LED driver type (triac/phase-cut, 0–10V, or DALI). If you retrofit, check compatibility lists to avoid flicker. For downlight bulb fittings, GU10 and MR16 remain common. GU10 runs on mains voltage, which simplifies wiring. MR16 typically uses a transformer; therefore, ensure the transformer matches LED load requirements. Integrated LED modules pair drivers and chips for longer life and better optics, but you replace the entire unit when it eventually ages.
Bathroom Zones and Downlight Fittings for Bathroom
Wet areas demand special care. Downlight fittings for bathroom must meet the right IP rating:
-
IP44 or higher for general bathroom zones where splashes occur
-
IP65 for shower zones where jets and steam concentrate
Because moisture corrodes low-quality materials, choose anodized or coated trims. Moreover, use sealed fire-rated housings where building codes demand them. Finally, always connect through an RCD where your local electrical standards require it.
Fire Rating, Insulation, and Safety
In many ceilings, the fitting penetrates a fire-resistant barrier. Fire-rated housings help maintain compartmentation. Where insulation sits above the ceiling, confirm your fixture is IC-rated (insulation-contact) or maintain the clearance the manufacturer specifies. Good thermal management extends LED life and preserves lumen output. As a result, you prevent premature dimming or color shift.
Downlight Fittings Price: What Affects Cost?
Downlight fittings price depends on build quality, driver type, CRI, dimming method, beam control, and IP/fire ratings. Entry ranges cover basic fixed trims and non-dimmable drivers. Mid-range products add better optics, dimming, and CRI 90+. Premium models bring tool-less aiming, low-glare architecture, and advanced control protocols. Although cheaper units look tempting, higher-quality fittings often pay back through reliability, smoother dimming, and fewer replacements.
Design Recipes for Every Room
Because every room behaves differently, tailor your LED downlight fitting choices room by room.
Kitchen and Pantry
-
Use neutral 3500–4000K for clarity.
-
Place narrow beams over islands to highlight texture.
-
Add under-cabinet strips for shadow-free prep.
-
Choose adjustable gimbals to fine-tune after you set appliances.
Living and Lounge
-
Layer light: a grid of wide beams for ambience, a few gimbals to lift art or plants.
-
Dim often. Comfort increases when you drop light levels at night.
Bedrooms
-
Use warm 2700–3000K.
-
Keep glare low with deep-recess trims.
-
Add a pair of adjustable reading heads so one person can read while the other sleeps.
Bathrooms
-
Select downlight fittings for bathroom with IP44+ for general areas and IP65 for showers.
-
Use 3000–3500K to balance clarity with warmth.
-
Consider a softer night-light circuit for midnight trips.
Hallways and Stairs
-
Space fixtures further apart to create rhythm.
-
Highlight landings or feature walls for drama and safety.
Retrofit vs New Build
When retrofitting, measure existing cut-outs carefully. If your new LED downlight fitting needs a larger hole, use an oversize trim or a hole-saw template for clean results. If the new fitting is smaller, select an adapter plate. Moreover, confirm ceiling depth, cable routes, and any insulation above. In new builds, coordinate early with the electrician and the ceiling contractor. Because everyone aligns on cut-outs and cabling paths, you avoid delays and rework.
Installation Checklist (Read This Before You Cut)
-
Confirm circuit load, breaker size, and dimmer compatibility
-
Mark studs, joists, and services with a detector
-
Drill a pilot hole and test with a stiff wire before you cut the full aperture
-
Use the correct hole saw for your downlight fittings sizes
-
Pull slack for the driver and connector; avoid tight bends
-
Secure the driver in a ventilated zone; do not bury it in insulation unless the product allows it
-
Test every light before you patch and paint
Because you follow a checklist, you reduce errors and speed up the project.
Smart Control and Energy Savings
Pair your LED downlight fitting with occupancy sensors, daylight sensors, and scenes. Motion sensors trim energy in corridors and bathrooms. Daylight harvesting reduces output near windows while maintaining a consistent look across the room. Meanwhile, voice control and app scenes add convenience for movie nights and dinner parties. Consequently, your home feels both efficient and effortless.
Common Mistakes and How to Avoid Them
-
Over-spacing: Large gaps create dark zones. Use beam charts to set spacing equal to about 1–1.2x the mounting height for wide beams.
-
Glare: Shallow trims and high output cause harshness. Choose low-glare optics or reduce output where you don’t need punch.
-
Mismatched dimmers: Not all drivers like all dimmers. Check compatibility charts.
-
Wrong IP rating: Bathrooms and eaves need protection. Always check the zone and pick the rating accordingly.
-
Ignoring CRI: Colors look dull under low CRI. Choose 90+ where appearance matters.
Because you fix these five issues, your project ends up cleaner, calmer, and more efficient.
Maintenance and Longevity
Quality LEDs run for tens of thousands of hours. Dust the trims, wipe lenses gently, and keep driver areas ventilated. If a unit fails, test the dimmer and driver before replacing the entire fitting. Keep spare trims and a matching driver on hand for futureproofing, especially for feature areas where a perfect match matters.
When to Choose Integrated vs Lamp-Based
An integrated LED downlight fitting merges the light engine and optics for excellent thermal control and beam quality. You gain superior glare management and consistent color. However, replacement means swapping the whole unit. Lamp-based fittings (GU10/MR16) let you change lamps easily and adjust wattage or color temperature later. They suit basic retrofits and budget-sensitive projects. Therefore, decide based on your need for premium optics vs quick serviceability.
Sustainability and Compliance
Select fittings with documented efficacy (lumens per watt) and credible certifications. Choose recyclable materials and low-VOC finishes. Because sustainability now influences property value and corporate reporting, efficient lighting upgrades often support both comfort and compliance goals.
Putting It All Together: A Sample Room Plan
Imagine a 5 m × 4 m open-plan living area with a 2.7 m ceiling. You want soft ambience plus a few accents. You choose eight wide-beam ceiling downlight fittings spaced on a 2 m grid, 70 cm off the walls. Then you add two gimbal spots to wash a bookshelf and a painting at 30°. Finally, you group the ambient grid and the accent pair on separate dimmers. The result feels layered and flexible without visual clutter.
Conclusion
Choose LED downlight fitting solutions with purpose, and your rooms will glow with balanced, efficient light. Start by planning beam angles and spacing. Then set color temperature and CRI to match the mood. Next, confirm downlight fittings sizes, drivers, and dimmer compatibility. Finally, respect safety with the right IP and fire ratings—especially for downlight fittings for bathrooms. When you weigh downlight fittings price against build quality, you’ll often save in the long run through reliability and better optics. Because you now know how to specify, place, and control your fixtures, you can upgrade with confidence and enjoy a cleaner ceiling, lower bills, and a more beautiful home.
FAQs
What is the best color temperature for an LED downlight fitting in living rooms?
Warm white around 2700–3000K creates a cozy feel, while 3500K adds crispness for reading and entertaining.
How many LED downlight fittings should I use in a small bedroom?
Start with four wide-beam fittings in a modest grid for even coverage, then add bedside task lights as needed.
Which downlight fittings sizes work in standard homes?
Cut-outs around 70–95 mm suit most rooms. Larger apertures can work in high ceilings or open-plan spaces.
Do I need special downlight fittings for bathroom zones?
Yes. Use IP44 or higher for splash zones and IP65 for showers to handle moisture and steam safely.
What affects downlight fittings price the most?
Optics quality, CRI, dimming type, driver reliability, and IP/fire ratings influence cost more than raw wattage.
Should I pick integrated LEDs or replaceable downlight bulb fittings?
Integrated models deliver better optics and glare control; GU10/MR16 options offer easy replacement and flexibility.
How far from the wall should I place ceiling downlight fittings?
About 60–90 cm generally prevents harsh scallops and improves wall washing.
Can I dim every LED downlight fitting?
Only if the driver supports it and the dimmer matches the driver type. Always check compatibility first.
What CRI should I look for in kitchens and living rooms?
CRI 90+ renders colors accurately, which keeps food, fabrics, and skin tones looking natural.
How do I avoid glare with powerful LEDs?
Choose deep-recess trims, low-glare lenses, or wider beams. Then aim gimbals carefully and dim the taste.
Get For further Information : Smart Life Lighting and Electrical